
DevExpress Documentations is now accessible as an MCP server
Great News for DevExpress and GitHub Copilot Users!
I have exciting news for developers using DevExpress and GitHub Copilot together.
Lately, I’ve been writing a lot of code and absolutely love using GitHub Copilot for this work. I initially used it on VS Code – while I wasn’t a big fan of VS Code before, it’s always been Microsoft’s favorite child and consistently gets the newest and shiniest functionality first. Now Visual Studio (for serious development work, haha) is also getting love from Microsoft, and both IDEs have implemented agent mode.
Following up on this good news, today (August 5, 2025) I saw a post from Dennis Garavsky from DevExpress in our Facebook group (https://www.facebook.com/groups/701851593510732). He shared instructions on how to use the DevExpress Documentation MCP server – it’s basically just 3 simple steps:
Setup Instructions
1. Enable Agent Mode on GitHub Copilot
First, enable agent mode on GitHub Copilot. You can find detailed instructions here:
https://learn.microsoft.com/en-us/visualstudio/ide/copilot-agent-mode?view=vs-2022
2. Create the MCP Configuration File
Create a .mcp.json file in your user profile directory. You can find your user directory by pasting %USERPROFILE% into Windows Explorer.
Here’s the content for the .mcp.json file:
{
"servers": {
"dxdocs": {
"url": "https://api.devexpress.com/mcp/docs",
"type": "http"
},
"msdocs": {
"url": "https://learn.microsoft.com/api/mcp",
"type": "http"
}
}
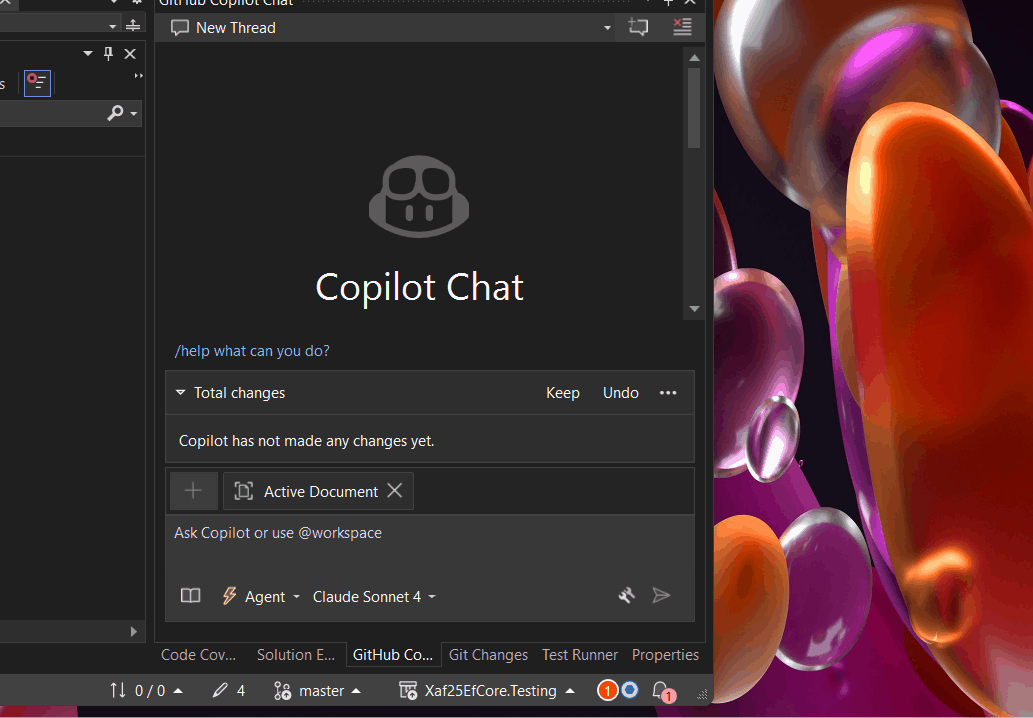
}3. Enable MCP in Your Tool
Enable the MCP in your development environment (see the attached screenshot for reference).
How to Use It
Now you can add the phrase “Use dxdocs” to your prompts and voilà! The magic happens.
Example prompt:
“Create a domain object for a customer, add a code name and address property and validate for null using XAF validation rules. Use dxdocs”
Important Disclaimer from DevExpress
The DevExpress MCP Documentation Server is currently available as a preview. Certain DevExpress-related coding tasks may still need further server and prompt fine-tuning. Please share your experience in the comments – both with and without this MCP. Let us know what needs improvement, what additional steps you took to get better results with AI tools in general, and any other feedback you have.
Happy coding with your new AI-powered DevExpress development experience!
Understanding Keycloak: An Identity Management Solution for .NET Developers
In modern application development, managing user authentication and authorization across multiple systems has become a significant challenge. Keycloak emerges as a compelling solution to address these identity management complexities, offering particular value for .NET developers seeking flexible authentication options.
What is Keycloak?
Keycloak is an open-source Identity and Access Management (IAM) solution developed by Red Hat. It functions as a centralized authentication and authorization server that manages user identities and controls access across multiple applications and services within an organization.
Rather than each application handling its own user authentication independently, Keycloak provides a unified identity provider that enables Single Sign-On (SSO) capabilities. Users authenticate once with Keycloak and gain seamless access to all authorized applications without repeated login prompts.
Core Functionality
Keycloak serves as a comprehensive identity management platform that handles several critical functions. It manages user authentication through various methods including traditional username/password combinations, multi-factor authentication, and social login integration with providers like Google, Facebook, and GitHub.
Beyond authentication, Keycloak provides robust authorization capabilities, controlling what authenticated users can access within applications through role-based access control and fine-grained permissions. The platform supports industry-standard protocols including OpenID Connect, OAuth 2.0, and SAML 2.0, ensuring compatibility with a wide range of applications and services.
User federation capabilities allow Keycloak to integrate with existing user directories such as LDAP and Active Directory, enabling organizations to leverage their current user stores rather than requiring complete migration to new systems.
The Problem Keycloak Addresses
Modern users often experience “authentication fatigue” – the exhaustion that comes from repeatedly logging into multiple systems throughout their workday. A typical enterprise user might need to authenticate with email systems, project management tools, CRM platforms, cloud storage, HR portals, and various internal applications, each potentially requiring different credentials and authentication flows.
This fragmentation leads to several problems: users struggle with password management across multiple systems, productivity decreases due to time spent on authentication processes, security risks increase as users resort to password reuse or weak passwords, and IT support costs rise due to frequent password reset requests.
Keycloak eliminates these friction points by providing seamless SSO while simultaneously improving security through centralized identity management and consistent security policies.
Keycloak and .NET Integration
For .NET developers, Keycloak offers excellent compatibility through its support of standard authentication protocols. The platform’s adherence to OpenID Connect and OAuth 2.0 standards means it integrates naturally with .NET applications using Microsoft’s built-in authentication middleware.
.NET Core and .NET 5+ applications can integrate with Keycloak using the Microsoft.AspNetCore.Authentication.OpenIdConnect package, while older .NET Framework applications can utilize OWIN middleware. Blazor applications, both Server and WebAssembly variants, support the same integration patterns, and Web APIs can be secured using JWT tokens issued by Keycloak.
The integration process typically involves configuring authentication middleware in the .NET application to communicate with Keycloak’s endpoints, establishing client credentials, and defining appropriate scopes and redirect URIs. This standards-based approach ensures that .NET developers can leverage their existing knowledge of authentication patterns while benefiting from Keycloak’s advanced identity management features.
Benefits for .NET Development
Keycloak offers several advantages for .NET developers and organizations. As an open-source solution, it provides cost-effectiveness compared to proprietary alternatives while offering extensive customization capabilities that proprietary solutions often restrict.
The platform reduces development time by handling complex authentication scenarios out-of-the-box, allowing developers to focus on business logic rather than identity management infrastructure. Security benefits include centralized policy management, regular security updates, and implementation of industry best practices.
Keycloak’s vendor-neutral approach provides flexibility for organizations using multiple cloud providers or seeking to avoid vendor lock-in. The solution scales effectively through clustered deployments and supports high-availability configurations suitable for enterprise environments.
Comparison with Microsoft Solutions
When compared to Microsoft’s identity offerings like Entra ID (formerly Azure AD), Keycloak presents different trade-offs. Microsoft’s solutions provide seamless integration within the Microsoft ecosystem and offer managed services with minimal maintenance requirements, but come with subscription costs and potential vendor lock-in considerations.
Keycloak, conversely, offers complete control over deployment and data, extensive customization options, and freedom from licensing fees. However, it requires organizations to manage their own infrastructure and maintain the necessary technical expertise.
When Keycloak Makes Sense
Keycloak represents an ideal choice for .NET developers and organizations that prioritize flexibility, cost control, and customization capabilities. It’s particularly suitable for scenarios involving multiple cloud providers, integration with diverse systems, or requirements for extensive branding and workflow customization.
Organizations with the technical expertise to manage infrastructure and those seeking vendor independence will find Keycloak’s open-source model advantageous. The solution also appeals to teams building applications that need to work across different technology stacks and cloud environments.
Conclusion
Keycloak stands as a robust, flexible identity management solution that integrates seamlessly with .NET applications through standard authentication protocols. Its open-source nature, comprehensive feature set, and standards-based approach make it a compelling alternative to proprietary identity management solutions.
For .NET developers seeking powerful identity management capabilities without vendor lock-in, Keycloak provides the tools necessary to implement secure, scalable authentication solutions while maintaining the flexibility to adapt to changing requirements and diverse technology environments.
MailHog: The Essential Email Testing Tool for .NET Developers
Email functionality is a critical component of most modern applications, from user authentication and password resets to notifications and marketing campaigns. However, testing email features during development can be challenging—you don’t want to accidentally send test emails to real users, and setting up a complete email server for testing is often overkill. This is where MailHog comes to the rescue.
What is MailHog?
MailHog is an open-source email testing tool designed specifically for development and testing environments. Think of it as a “fake” SMTP server that captures emails sent by your application instead of delivering them to real recipients. It provides a clean web interface where you can view, inspect, and manage all captured emails in real-time.
Built with Go and completely free, MailHog has become an indispensable tool for developers who need to test email functionality without the complexity and risks associated with real email delivery.
Why MailHog is Perfect for .NET Development
As a .NET developer, you’ve likely encountered scenarios where you need to test:
- User registration and email verification
- Password reset workflows
- Account activation processes
- Notification systems
- Email templates and formatting
MailHog seamlessly integrates with .NET applications using the standard SMTP libraries you’re already familiar with. Whether you’re using System.Net.Mail.SmtpClient or other SMTP libraries, MailHog works transparently as a drop-in replacement for your production SMTP server.
Key Features That Make MailHog Stand Out
SMTP Server Compliance
- Full RFC5321 ESMTP server implementation
- Support for SMTP AUTH (RFC4954) and PIPELINING (RFC2920)
- Works with any SMTP client library
Developer-Friendly Interface
- Clean web UI to view messages in plain text, HTML, or raw source
- Real-time updates using EventSource technology
- Support for RFC2047 encoded headers
- Multipart MIME support with downloadable individual parts
Testing and Development Features
- Chaos Monkey: Built-in failure testing to simulate email delivery issues
- Message Release: Forward captured emails to real SMTP servers when needed
- HTTP API: Programmatically list, retrieve, and delete messages (APIv1 and APIv2)
- Authentication: HTTP basic authentication for UI and API security
Storage Options
- In-memory storage: Lightweight and fast for development
- MongoDB persistence: For scenarios requiring message persistence
- File-based storage: Simple file system storage option
Deployment Benefits
- Lightweight and portable: Single binary with no dependencies
- No installation required: Download and run
- Cross-platform: Works on Windows, macOS, and Linux
Installing MailHog on WSL2
Setting up MailHog on Windows Subsystem for Linux (WSL2) is straightforward and provides excellent performance for .NET development workflows.
Option 1: Automated Installation with Script
If you don’t want to manually install MailHog, you can use my automated installation script for WSL:
# Download and run the installation script
curl -sSL https://raw.githubusercontent.com/egarim/MyWslScripts/master/install_mailhog.sh | bash
This script will automatically download MailHog, set it up, and configure it as a service. You can find the script at: https://github.com/egarim/MyWslScripts/blob/master/install_mailhog.sh
Option 2: Manual Installation
Step 1: Download MailHog
# Create a directory for MailHog
mkdir ~/mailhog
cd ~/mailhog

# Download the latest Linux binary
wget https://github.com/mailhog/MailHog/releases/download/v1.0.1/MailHog_linux_amd64

# Make it executable
chmod +x MailHog_linux_amd64

# Optional: Create a symlink for easier access
sudo ln -s ~/mailhog/MailHog_linux_amd64 /usr/local/bin/mailhog
Step 2: Start MailHog
# Start MailHog (runs on ports 1025 for SMTP and 8025 for web UI)
./MailHog_linux_amd64

# Or if you created the symlink:
mailhog
Step 3: Verify Installation
Open your browser and navigate to http://localhost:8025. You should see the MailHog web interface ready to capture emails.
Step 4: Configure as a Service (Optional)
For persistent use, create a systemd service:
# Create service file
sudo nano /etc/systemd/system/mailhog.service
Add the following content:
[Unit]
Description=MailHog Email Web Service
After=network.target

[Service]
Type=simple
User=your-username
ExecStart=/home/your-username/mailhog/MailHog_linux_amd64
Restart=always

[Install]
WantedBy=multi-user.target
Enable and start the service:
sudo systemctl enable mailhog
sudo systemctl start mailhog
Integrating MailHog with .NET Applications
Configuration in appsettings.json
{
  "EmailSettings": {
    "SmtpServer": "localhost",
    "SmtpPort": 1025,
    "FromEmail": "noreply@yourapp.com",
    "FromName": "Your Application"
  }
}
Using with System.Net.Mail
public class EmailService
{
    private readonly IConfiguration _configuration;

    public EmailService(IConfiguration configuration)
    {
        _configuration = configuration;
    }

    public async Task SendEmailAsync(string to, string subject, string body)
    {
        var smtpClient = new SmtpClient(_configuration["EmailSettings:SmtpServer"])
        {
            Port = int.Parse(_configuration["EmailSettings:SmtpPort"]),
            EnableSsl = false, // MailHog doesn't require SSL
            UseDefaultCredentials = true
        };

        var mailMessage = new MailMessage
        {
            From = new MailAddress(_configuration["EmailSettings:FromEmail"],
                                 _configuration["EmailSettings:FromName"]),
            Subject = subject,
            Body = body,
            IsBodyHtml = true
        };

        mailMessage.To.Add(to);

        await smtpClient.SendMailAsync(mailMessage);
    }
}
Real-World Testing Scenarios
Password Reset Testing
[Fact]
public async Task PasswordReset_ShouldSendEmail()
{
    // Arrange
    var userEmail = "test@example.com";
    var resetToken = Guid.NewGuid().ToString();

    // Act
    await _authService.SendPasswordResetEmailAsync(userEmail, resetToken);

    // Assert - Check MailHog API for sent email
    var httpClient = new HttpClient();
    var response = await httpClient.GetAsync("http://localhost:8025/api/v2/messages");
    var messages = JsonSerializer.Deserialize<MailHogResponse>(await response.Content.ReadAsStringAsync());

    Assert.Single(messages.Items);
    Assert.Contains(resetToken, messages.Items[0].Content.Body);
}
Email Template Verification
With MailHog’s web interface, you can:
- Preview HTML email templates exactly as recipients would see them
- Test responsive design across different screen sizes
- Verify that images and styling render correctly
- Check for broken links or formatting issues
Advanced MailHog Usage
Environment-Specific Configuration
Use different MailHog instances for different environments:
# Development environment
mailhog -smtp-bind-addr 127.0.0.1:1025 -ui-bind-addr 127.0.0.1:8025

# Testing environment
mailhog -smtp-bind-addr 127.0.0.1:1026 -ui-bind-addr 127.0.0.1:8026
API Integration for Automated Tests
public class MailHogClient
{
    private readonly HttpClient _httpClient;

    public MailHogClient()
    {
        _httpClient = new HttpClient { BaseAddress = new Uri("http://localhost:8025/") };
    }

    public async Task<IEnumerable<Email>> GetEmailsAsync()
    {
        var response = await _httpClient.GetAsync("api/v2/messages");
        var content = await response.Content.ReadAsStringAsync();
        var mailHogResponse = JsonSerializer.Deserialize<MailHogResponse>(content);
        return mailHogResponse.Items;
    }

    public async Task DeleteAllEmailsAsync()
    {
        await _httpClient.DeleteAsync("api/v1/messages");
    }
}
Why I Use MailHog Daily
As someone who works extensively with .NET applications requiring email functionality, MailHog has become an essential part of my development toolkit. Here’s why:
Reliability: No more worrying about test emails reaching real users or bouncing back from invalid addresses.
Speed: Instant email capture and viewing without network delays or external dependencies.
Debugging: The ability to inspect raw email headers and content makes troubleshooting email issues much easier.
Team Collaboration: Developers can share MailHog URLs to demonstrate email functionality during code reviews or testing sessions.
CI/CD Integration: MailHog works perfectly in Docker containers and automated testing pipelines.
Conclusion
MailHog represents the perfect balance of simplicity and functionality for email testing in .NET development. Its open-source nature, zero-configuration setup, and comprehensive feature set make it an invaluable tool for any developer working with email functionality.
Whether you’re building a simple contact form or a complex multi-tenant application with sophisticated email workflows, MailHog provides the testing infrastructure you need without the complexity of traditional email servers.
Give MailHog a try in your next .NET project—you’ll wonder how you ever developed email features without it.
Resources:
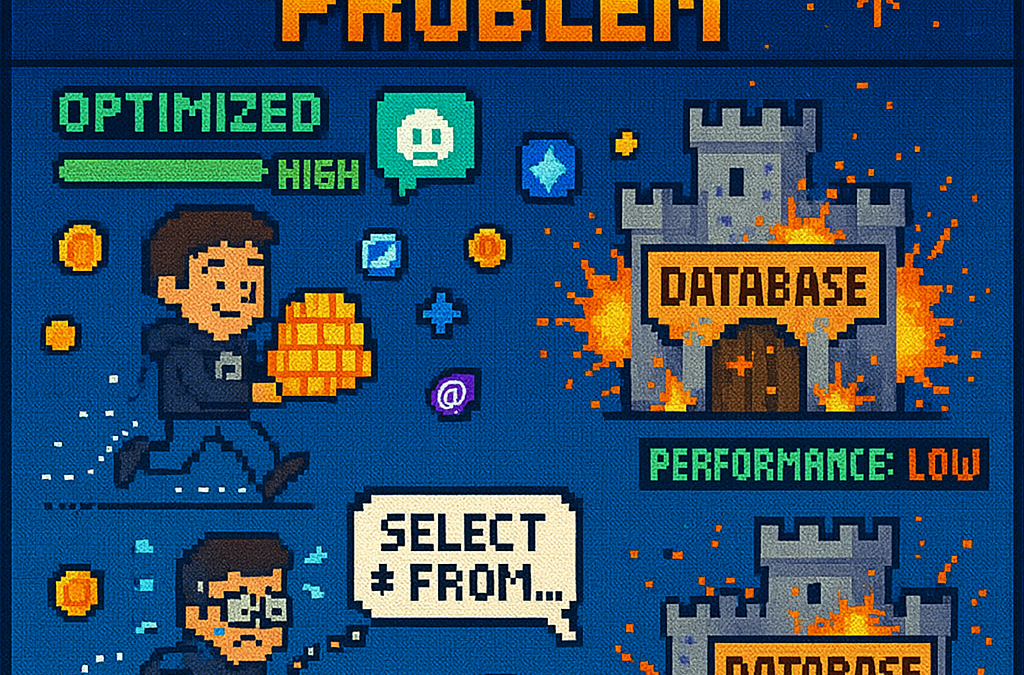
Understanding the N+1 Database Problem using Entity Framework Core
What is the N+1 Problem?
Imagine you’re running a blog website and want to display a list of all blogs along with how many posts each one has. The N+1 problem is a common database performance issue that happens when your application makes way too many database trips to get this simple information.
Our Test Database Setup
Our test suite creates a realistic blog scenario with:
- 3 different blogs
- Multiple posts for each blog
- Comments on posts
- Tags associated with blogs
This mirrors real-world applications where data is interconnected and needs to be loaded efficiently.
Test Case 1: The Classic N+1 Problem (Lazy Loading)
What it does: This test demonstrates how “lazy loading” can accidentally create the N+1 problem. Lazy loading sounds helpful – it automatically fetches related data when you need it. But this convenience comes with a hidden cost.
The Code:
[Test]
public void Test_N_Plus_One_Problem_With_Lazy_Loading()
{
    var blogs = _context.Blogs.ToList(); // Query 1: Load blogs

    foreach (var blog in blogs)
    {
        var postCount = blog.Posts.Count; // Each access triggers a query!
        TestLogger.WriteLine($"Blog: {blog.Title} - Posts: {postCount}");
    }
}
The SQL Queries Generated:
-- Query 1: Load all blogs
SELECT "b"."Id", "b"."CreatedDate", "b"."Description", "b"."Title"
FROM "Blogs" AS "b"

-- Query 2: Load posts for Blog 1 (triggered by lazy loading)
SELECT "p"."Id", "p"."BlogId", "p"."Content", "p"."PublishedDate", "p"."Title"
FROM "Posts" AS "p"
WHERE "p"."BlogId" = 1

-- Query 3: Load posts for Blog 2 (triggered by lazy loading)
SELECT "p"."Id", "p"."BlogId", "p"."Content", "p"."PublishedDate", "p"."Title"
FROM "Posts" AS "p"
WHERE "p"."BlogId" = 2

-- Query 4: Load posts for Blog 3 (triggered by lazy loading)
SELECT "p"."Id", "p"."BlogId", "p"."Content", "p"."PublishedDate", "p"."Title"
FROM "Posts" AS "p"
WHERE "p"."BlogId" = 3
The Problem: 4 total queries (1 + 3) – Each time you access blog.Posts.Count, lazy loading triggers a separate database trip.
Test Case 2: Alternative N+1 Demonstration
What it does: This test manually recreates the N+1 pattern to show exactly what’s happening, even if lazy loading isn’t working properly.
The Code:
[Test]
public void Test_N_Plus_One_Problem_Alternative_Approach()
{
    var blogs = _context.Blogs.ToList(); // Query 1

    foreach (var blog in blogs)
    {
        // This explicitly loads posts for THIS blog only (simulates lazy loading)
        var posts = _context.Posts.Where(p => p.BlogId == blog.Id).ToList();
        TestLogger.WriteLine($"Loaded {posts.Count} posts for blog {blog.Id}");
    }
}
The Lesson: This explicitly demonstrates the N+1 pattern with manual queries. The result is identical to lazy loading – one query per blog plus the initial blogs query.
Test Case 3: N+1 vs Include() – Side by Side Comparison
What it does: This is the money shot – a direct comparison showing the dramatic difference between the problematic approach and the solution.
The Bad Code (N+1):
// BAD: N+1 Problem
var blogsN1 = _context.Blogs.ToList(); // Query 1
foreach (var blog in blogsN1)
{
    var posts = _context.Posts.Where(p => p.BlogId == blog.Id).ToList(); // Queries 2,3,4...
}
The Good Code (Include):
// GOOD: Include() Solution
var blogsInclude = _context.Blogs
    .Include(b => b.Posts)
    .ToList(); // Single query with JOIN

foreach (var blog in blogsInclude)
{
    // No additional queries needed - data is already loaded!
    var postCount = blog.Posts.Count;
}
The SQL Queries:
Bad Approach (Multiple Queries):
-- Same 4 separate queries as shown in Test Case 1Good Approach (Single Query):
SELECT "b"."Id", "b"."CreatedDate", "b"."Description", "b"."Title",
       "p"."Id", "p"."BlogId", "p"."Content", "p"."PublishedDate", "p"."Title"
FROM "Blogs" AS "b"
LEFT JOIN "Posts" AS "p" ON "b"."Id" = "p"."BlogId"
ORDER BY "b"."Id"
Results from our test:
- Bad approach: 4 total queries (1 + 3)
- Good approach: 1 total query
- Performance improvement: 75% fewer database round trips!
Test Case 4: Guaranteed N+1 Problem
What it does: This test removes any doubt by explicitly demonstrating the N+1 pattern with clear step-by-step output.
The Code:
[Test]
public void Test_Guaranteed_N_Plus_One_Problem()
{
    var blogs = _context.Blogs.ToList(); // Query 1
    int queryCount = 1;

    foreach (var blog in blogs)
    {
        queryCount++;
        // This explicitly demonstrates the N+1 pattern
        var posts = _context.Posts.Where(p => p.BlogId == blog.Id).ToList();
        TestLogger.WriteLine($"Loading posts for blog '{blog.Title}' (Query #{queryCount})");
    }
}
Why it’s useful: This ensures we can always see the problem clearly by manually executing the problematic pattern, making it impossible to miss.
Test Case 5: Eager Loading with Include()
What it does: Shows the correct way to load related data upfront using Include().
The Code:
[Test]
public void Test_Eager_Loading_With_Include()
{
    var blogsWithPosts = _context.Blogs
        .Include(b => b.Posts)
        .ToList();

    foreach (var blog in blogsWithPosts)
    {
        // No additional queries - data already loaded!
        TestLogger.WriteLine($"Blog: {blog.Title} - Posts: {blog.Posts.Count}");
    }
}
The SQL Query:
SELECT "b"."Id", "b"."CreatedDate", "b"."Description", "b"."Title",
       "p"."Id", "p"."BlogId", "p"."Content", "p"."PublishedDate", "p"."Title"
FROM "Blogs" AS "b"
LEFT JOIN "Posts" AS "p" ON "b"."Id" = "p"."BlogId"
ORDER BY "b"."Id"
The Benefit: One database trip loads everything. When you access blog.Posts.Count, the data is already there.
Test Case 6: Multiple Includes with ThenInclude()
What it does: Demonstrates loading deeply nested data – blogs → posts → comments – all in one query.
The Code:
[Test]
public void Test_Multiple_Includes_With_ThenInclude()
{
    var blogsWithPostsAndComments = _context.Blogs
        .Include(b => b.Posts)
            .ThenInclude(p => p.Comments)
        .ToList();

    foreach (var blog in blogsWithPostsAndComments)
    {
        foreach (var post in blog.Posts)
        {
            // All data loaded in one query!
            TestLogger.WriteLine($"Post: {post.Title} - Comments: {post.Comments.Count}");
        }
    }
}
The SQL Query:
SELECT "b"."Id", "b"."CreatedDate", "b"."Description", "b"."Title",
       "p"."Id", "p"."BlogId", "p"."Content", "p"."PublishedDate", "p"."Title",
       "c"."Id", "c"."Author", "c"."Content", "c"."CreatedDate", "c"."PostId"
FROM "Blogs" AS "b"
LEFT JOIN "Posts" AS "p" ON "b"."Id" = "p"."BlogId"
LEFT JOIN "Comments" AS "c" ON "p"."Id" = "c"."PostId"
ORDER BY "b"."Id", "p"."Id"
The Challenge: Loading three levels of data in one optimized query instead of potentially hundreds of separate queries.
Test Case 7: Projection with Select()
What it does: Shows how to load only the specific data you actually need instead of entire objects.
The Code:
[Test]
public void Test_Projection_With_Select()
{
    var blogData = _context.Blogs
        .Select(b => new
        {
            BlogTitle = b.Title,
            PostCount = b.Posts.Count(),
            RecentPosts = b.Posts
                .OrderByDescending(p => p.PublishedDate)
                .Take(2)
                .Select(p => new { p.Title, p.PublishedDate })
        })
        .ToList();
}
The SQL Query (from our test output):
SELECT "b"."Title", (
    SELECT COUNT(*)
    FROM "Posts" AS "p"
    WHERE "b"."Id" = "p"."BlogId"), "b"."Id", "t0"."Title", "t0"."PublishedDate", "t0"."Id"
FROM "Blogs" AS "b"
LEFT JOIN (
    SELECT "t"."Title", "t"."PublishedDate", "t"."Id", "t"."BlogId"
    FROM (
        SELECT "p0"."Title", "p0"."PublishedDate", "p0"."Id", "p0"."BlogId",
               ROW_NUMBER() OVER(PARTITION BY "p0"."BlogId" ORDER BY "p0"."PublishedDate" DESC) AS "row"
        FROM "Posts" AS "p0"
    ) AS "t"
    WHERE "t"."row" <= 2
) AS "t0" ON "b"."Id" = "t0"."BlogId"
ORDER BY "b"."Id", "t0"."BlogId", "t0"."PublishedDate" DESC
Why it matters: This query only loads the specific fields needed, uses window functions for efficiency, and calculates counts in the database rather than loading full objects.
Test Case 8: Split Query Strategy
What it does: Demonstrates an alternative approach where one large JOIN is split into multiple optimized queries.
The Code:
[Test]
public void Test_Split_Query()
{
    var blogs = _context.Blogs
        .AsSplitQuery()
        .Include(b => b.Posts)
        .Include(b => b.Tags)
        .ToList();
}
The SQL Queries (from our test output):
-- Query 1: Load blogs
SELECT "b"."Id", "b"."CreatedDate", "b"."Description", "b"."Title"
FROM "Blogs" AS "b"
ORDER BY "b"."Id"

-- Query 2: Load posts (automatically generated)
SELECT "p"."Id", "p"."BlogId", "p"."Content", "p"."PublishedDate", "p"."Title", "b"."Id"
FROM "Blogs" AS "b"
INNER JOIN "Posts" AS "p" ON "b"."Id" = "p"."BlogId"
ORDER BY "b"."Id"

-- Query 3: Load tags (automatically generated)
SELECT "t"."Id", "t"."Name", "b"."Id"
FROM "Blogs" AS "b"
INNER JOIN "BlogTag" AS "bt" ON "b"."Id" = "bt"."BlogsId"
INNER JOIN "Tags" AS "t" ON "bt"."TagsId" = "t"."Id"
ORDER BY "b"."Id"
When to use it: When JOINing lots of related data creates one massive, slow query. Split queries break this into several smaller, faster queries.
Test Case 9: Filtered Include()
What it does: Shows how to load only specific related data – in this case, only recent posts from the last 15 days.
The Code:
[Test]
public void Test_Filtered_Include()
{
    var cutoffDate = DateTime.Now.AddDays(-15);
    var blogsWithRecentPosts = _context.Blogs
        .Include(b => b.Posts.Where(p => p.PublishedDate > cutoffDate))
        .ToList();
}
The SQL Query:
SELECT "b"."Id", "b"."CreatedDate", "b"."Description", "b"."Title",
       "p"."Id", "p"."BlogId", "p"."Content", "p"."PublishedDate", "p"."Title"
FROM "Blogs" AS "b"
LEFT JOIN "Posts" AS "p" ON "b"."Id" = "p"."BlogId" AND "p"."PublishedDate" > @cutoffDate
ORDER BY "b"."Id"
The Efficiency: Only loads posts that meet the criteria, reducing data transfer and memory usage.
Test Case 10: Explicit Loading
What it does: Demonstrates manually controlling when related data gets loaded.
The Code:
[Test]
public void Test_Explicit_Loading()
{
    var blogs = _context.Blogs.ToList(); // Load blogs only

    // Now explicitly load posts for all blogs
    foreach (var blog in blogs)
    {
        _context.Entry(blog)
            .Collection(b => b.Posts)
            .Load();
    }
}
The SQL Queries:
-- Query 1: Load blogs
SELECT "b"."Id", "b"."CreatedDate", "b"."Description", "b"."Title"
FROM "Blogs" AS "b"

-- Query 2: Explicitly load posts for blog 1
SELECT "p"."Id", "p"."BlogId", "p"."Content", "p"."PublishedDate", "p"."Title"
FROM "Posts" AS "p"
WHERE "p"."BlogId" = 1

-- Query 3: Explicitly load posts for blog 2
SELECT "p"."Id", "p"."BlogId", "p"."Content", "p"."PublishedDate", "p"."Title"
FROM "Posts" AS "p"
WHERE "p"."BlogId" = 2

-- ... and so on
When useful: When you sometimes need related data and sometimes don’t. You control exactly when the additional database trip happens.
Test Case 11: Batch Loading Pattern
What it does: Shows a clever technique to avoid N+1 by loading all related data in one query, then organizing it in memory.
The Code:
[Test]
public void Test_Batch_Loading_Pattern()
{
    var blogs = _context.Blogs.ToList(); // Query 1
    var blogIds = blogs.Select(b => b.Id).ToList();

    // Single query to get all posts for all blogs
    var posts = _context.Posts
        .Where(p => blogIds.Contains(p.BlogId))
        .ToList(); // Query 2

    // Group posts by blog in memory
    var postsByBlog = posts.GroupBy(p => p.BlogId).ToDictionary(g => g.Key, g => g.ToList());
}
The SQL Queries:
-- Query 1: Load all blogs
SELECT "b"."Id", "b"."CreatedDate", "b"."Description", "b"."Title"
FROM "Blogs" AS "b"

-- Query 2: Load ALL posts for ALL blogs in one query
SELECT "p"."Id", "p"."BlogId", "p"."Content", "p"."PublishedDate", "p"."Title"
FROM "Posts" AS "p"
WHERE "p"."BlogId" IN (1, 2, 3)
The Result: Just 2 queries total, regardless of how many blogs you have. Data organization happens in memory.
Test Case 12: Performance Comparison
What it does: Puts all the approaches head-to-head to show their relative performance.
The Code:
[Test]
public void Test_Performance_Comparison()
{
    // N+1 Problem (Multiple Queries)
    var blogs1 = _context.Blogs.ToList();
    foreach (var blog in blogs1)
    {
        var count = blog.Posts.Count(); // Triggers separate query
    }

    // Eager Loading (Single Query)
    var blogs2 = _context.Blogs
        .Include(b => b.Posts)
        .ToList();

    // Projection (Minimal Data)
    var blogSummaries = _context.Blogs
        .Select(b => new { b.Title, PostCount = b.Posts.Count() })
        .ToList();
}
The SQL Queries Generated:
N+1 Problem: 4 separate queries (as shown in previous examples)
Eager Loading: 1 JOIN query (as shown in Test Case 5)
Projection: 1 optimized query with subquery:
SELECT "b"."Title", (
    SELECT COUNT(*)
    FROM "Posts" AS "p"
    WHERE "b"."Id" = "p"."BlogId") AS "PostCount"
FROM "Blogs" AS "b"
Real-World Performance Impact
Let’s scale this up to see why it matters:
Small Application (10 blogs):
- N+1 approach: 11 queries (≈110ms)
- Optimized approach: 1 query (≈10ms)
- Time saved: 100ms
Medium Application (100 blogs):
- N+1 approach: 101 queries (≈1,010ms)
- Optimized approach: 1 query (≈10ms)
- Time saved: 1 second
Large Application (1000 blogs):
- N+1 approach: 1001 queries (≈10,010ms)
- Optimized approach: 1 query (≈10ms)
- Time saved: 10 seconds
Key Takeaways
- The N+1 problem gets exponentially worse as your data grows
- Lazy loading is convenient but dangerous – it can hide performance problems
- Include() is your friend for loading related data efficiently
- Projection is powerful when you only need specific fields
- Different problems need different solutions – there’s no one-size-fits-all approach
- SQL query inspection is crucial – always check what queries your ORM generates
The Bottom Line
This test suite shows that small changes in how you write database queries can transform a slow, database-heavy operation into a fast, efficient one. The difference between a frustrated user waiting 10 seconds for a page to load and a happy user getting instant results often comes down to understanding and avoiding the N+1 problem.
The beauty of these tests is that they use real database queries with actual SQL output, so you can see exactly what’s happening under the hood. Understanding these patterns will make you a more effective developer and help you build applications that stay fast as they grow.
You can find the source for this article in my here
Day 4 (the missing day): Building Data Import/Export Services for Your ERP System
Welcome back to our ERP development series! In previous days, we’ve covered the foundational architecture, database design, and core entity structures for our accounting system. Today, we’re tackling an essential but often overlooked aspect of any enterprise software: data import and export capabilities.
Why is this important? Because no enterprise system exists in isolation. Companies need to move data between systems, migrate from legacy software, or simply handle batch data operations. In this article, we’ll build robust import/export services for the Chart of Accounts, demonstrating principles you can apply to any part of your ERP system.
The Importance of Data Exchange
Before diving into the code, let’s understand why dedicated import/export functionality matters:
- Data Migration – When companies adopt your ERP, they need to transfer existing data
- System Integration – ERPs need to exchange data with other business systems
- Batch Processing – Accountants often prepare data in spreadsheets before importing
- Backup & Transfer – Provides a simple way to backup or transfer configurations
- User Familiarity – Many users are comfortable working with CSV files
CSV (Comma-Separated Values) is our format of choice because it’s universally supported and easily edited in spreadsheet applications like Excel, which most business users are familiar with.
Our Implementation Approach
For our Chart of Accounts module, we’ll create:
- A service interface defining import/export operations
- A concrete implementation handling CSV parsing/generation
- Unit tests verifying all functionality
Our goal is to maintain clean separation of concerns, robust error handling, and clear validation rules.
Defining the Interface
First, we define a clear contract for our import/export service:
/// <summary>
/// Interface for chart of accounts import/export operations
/// </summary>
public interface IAccountImportExportService
{
    /// <summary>
    /// Imports accounts from a CSV file
    /// </summary>
    /// <param name="csvContent">Content of the CSV file as a string</param>
    /// <param name="userName">User performing the operation</param>
    /// <returns>Collection of imported accounts and any validation errors</returns>
    Task<(IEnumerable<IAccount> ImportedAccounts, IEnumerable<string> Errors)> ImportFromCsvAsync(string csvContent, string userName);

    /// <summary>
    /// Exports accounts to a CSV format
    /// </summary>
    /// <param name="accounts">Accounts to export</param>
    /// <returns>CSV content as a string</returns>
    Task<string> ExportToCsvAsync(IEnumerable<IAccount> accounts);
}
Notice how we use C# tuples to return both the imported accounts and any validation errors from the import operation. This gives callers full insight into the operation’s results.
Implementing CSV Import
The import method is the more complex of the two, requiring:
- Parsing and validating the CSV structure
- Converting CSV data to domain objects
- Validating the created objects
- Reporting any errors along the way
Here’s our implementation approach:
public async Task<(IEnumerable<IAccount> ImportedAccounts, IEnumerable<string> Errors)> ImportFromCsvAsync(string csvContent, string userName)
{
    List<AccountDto> importedAccounts = new List<AccountDto>();
    List<string> errors = new List<string>();

    if (string.IsNullOrEmpty(csvContent))
    {
        errors.Add("CSV content is empty");
        return (importedAccounts, errors);
    }

    try
    {
        // Split the CSV into lines
        string[] lines = csvContent.Split(new[] { "\r\n", "\r", "\n" }, StringSplitOptions.RemoveEmptyEntries);

        if (lines.Length <= 1)
        {
            errors.Add("CSV file contains no data rows");
            return (importedAccounts, errors);
        }

        // Assume first line is header
        string[] headers = ParseCsvLine(lines[0]);

        // Validate headers
        if (!ValidateHeaders(headers, errors))
        {
            return (importedAccounts, errors);
        }

        // Process data rows
        for (int i = 1; i < lines.Length; i++)
        {
            string[] fields = ParseCsvLine(lines[i]);

            if (fields.Length != headers.Length)
            {
                errors.Add($"Line {i + 1}: Column count mismatch. Expected {headers.Length}, got {fields.Length}");
                continue;
            }

            var account = CreateAccountFromCsvFields(headers, fields);

            // Validate account
            if (!_accountValidator.ValidateAccount(account))
            {
                errors.Add($"Line {i + 1}: Account validation failed for account {account.AccountName}");
                continue;
            }

            // Set audit information
            _auditService.SetCreationAudit(account, userName);

            importedAccounts.Add(account);
        }

        return (importedAccounts, errors);
    }
    catch (Exception ex)
    {
        errors.Add($"Error importing CSV: {ex.Message}");
        return (importedAccounts, errors);
    }
}
Key aspects of this implementation:
- Early validation – We quickly detect and report basic issues like empty input
- Row-by-row processing – Each line is processed independently, allowing partial success
- Detailed error reporting – We collect specific errors with line numbers
- Domain validation – We apply business rules from
AccountValidator - Audit trail – We set audit fields for each imported account
The ParseCsvLine method handles the complexities of CSV parsing, including quoted fields that may contain commas:
private string[] ParseCsvLine(string line)
{
    List<string> fields = new List<string>();
    bool inQuotes = false;
    int startIndex = 0;

    for (int i = 0; i < line.Length; i++)
    {
        if (line[i] == '"')
        {
            inQuotes = !inQuotes;
        }
        else if (line[i] == ',' && !inQuotes)
        {
            fields.Add(line.Substring(startIndex, i - startIndex).Trim().TrimStart('"').TrimEnd('"'));
            startIndex = i + 1;
        }
    }

    // Add the last field
    fields.Add(line.Substring(startIndex).Trim().TrimStart('"').TrimEnd('"'));

    return fields.ToArray();
}
Implementing CSV Export
The export method is simpler, converting domain objects to CSV format:
public Task<string> ExportToCsvAsync(IEnumerable<IAccount> accounts)
{
    if (accounts == null || !accounts.Any())
    {
        return Task.FromResult(GetCsvHeader());
    }

    StringBuilder csvBuilder = new StringBuilder();

    // Add header
    csvBuilder.AppendLine(GetCsvHeader());

    // Add data rows
    foreach (var account in accounts)
    {
        csvBuilder.AppendLine(GetCsvRow(account));
    }

    return Task.FromResult(csvBuilder.ToString());
}
We take special care to handle edge cases like null or empty collections, making the API robust against improper usage.
Testing the Implementation
Our test suite verifies both the happy paths and various error conditions:
- Import validation – Tests for empty content, missing headers, etc.
- Export formatting – Tests for proper CSV generation, handling of special characters
- Round-trip integrity – Tests exporting and re-importing preserves data integrity
For example, here’s a round-trip test to verify data integrity:
[Test]
public async Task RoundTrip_ExportThenImport_PreservesAccounts()
{
    // Arrange
    var originalAccounts = new List<IAccount>
    {
        new AccountDto
        {
            Id = Guid.NewGuid(),
            AccountName = "Cash",
            OfficialCode = "11000",
            AccountType = AccountType.Asset,
            // other properties...
        },
        new AccountDto
        {
            Id = Guid.NewGuid(),
            AccountName = "Accounts Receivable",
            OfficialCode = "12000",
            AccountType = AccountType.Asset,
            // other properties...
        }
    };

    // Act
    string csv = await _importExportService.ExportToCsvAsync(originalAccounts);
    var (importedAccounts, errors) = await _importExportService.ImportFromCsvAsync(csv, "Test User");

    // Assert
    Assert.That(errors, Is.Empty);
    Assert.That(importedAccounts.Count(), Is.EqualTo(originalAccounts.Count));

    // Check first account
    var firstOriginal = originalAccounts[0];
    var firstImported = importedAccounts.First();
    Assert.That(firstImported.AccountName, Is.EqualTo(firstOriginal.AccountName));
    Assert.That(firstImported.OfficialCode, Is.EqualTo(firstOriginal.OfficialCode));
    Assert.That(firstImported.AccountType, Is.EqualTo(firstOriginal.AccountType));

    // Check second account similarly...
}
Integration with the Broader System
This service isn’t meant to be used in isolation. In a complete ERP system, you’d typically:
- Add a controller to expose these operations via API endpoints
- Create UI components for file upload/download
- Implement progress reporting for larger imports
- Add transaction support to make imports atomic
- Include validation rules specific to your business domain
Design Patterns and Best Practices
Our implementation exemplifies several important patterns:
- Interface Segregation – The service has a focused, cohesive purpose
- Dependency Injection – We inject the
IAuditServicerather than creating it - Early Validation – We validate input before processing
- Detailed Error Reporting – We collect and return specific errors
- Defensive Programming – We handle edge cases and exceptions gracefully
Future Extensions
This pattern can be extended to other parts of your ERP system:
- Customer/Vendor Data – Import/export contact information
- Inventory Items – Handle product catalog updates
- Journal Entries – Process batch financial transactions
- Reports – Export financial data for external analysis
Conclusion
Data import/export capabilities are a critical component of any enterprise system. They bridge the gap between systems, facilitate migration, and support batch operations. By implementing these services with careful error handling and validation, we’ve added significant value to our ERP system.
In the next article, we’ll explore building financial reporting services to generate balance sheets, income statements, and other critical financial reports from our accounting data.
Stay tuned, and happy coding!
About Us
YouTube
https://www.youtube.com/c/JocheOjedaXAFXAMARINC
Our sites
Let’s discuss your XAF
This call/zoom will give you the opportunity to define the roadblocks in your current XAF solution. We can talk about performance, deployment or custom implementations. Together we will review you pain points and leave you with recommendations to get your app back in track
https://calendly.com/bitframeworks/bitframeworks-free-xaf-support-hour
Our free A.I courses on Udemy
-
- Introduction to Microsoft A.I Extensions
https://www.udemy.com/course/microsoft-ai-extensions/ - Introduction to Microsoft Semantic Kernel
https://www.udemy.com/course/semantic-kernel
- Introduction to Microsoft A.I Extensions
Building a Comprehensive Accounting System Integration Test – Day 5
Integration testing is a critical phase in software development where individual modules are combined and tested as a group. In our accounting system, we’ve created a robust integration test that demonstrates how the Document module and Chart of Accounts module interact to form a functional accounting system. In this post, I’ll explain the components and workflow of our integration test.
The Architecture of Our Integration Test
Our integration test simulates a small retail business’s accounting operations. Let’s break down the key components:
Test Fixture Setup
The AccountingIntegrationTests class contains all our test methods and is decorated with the [TestFixture] attribute to identify it as a NUnit test fixture. The Setup method initializes our services and data structures:
[SetUp]
public async Task Setup()
{
    // Initialize services
    _auditService = new AuditService();
    _documentService = new DocumentService(_auditService);
    _transactionService = new TransactionService();
    _accountValidator = new AccountValidator();
    _accountBalanceCalculator = new AccountBalanceCalculator();

    // Initialize storage
    _accounts = new Dictionary<string, AccountDto>();
    _documents = new Dictionary<string, IDocument>();
    _transactions = new Dictionary<string, ITransaction>();

    // Create Chart of Accounts
    await SetupChartOfAccounts();
}
This method:
- Creates instances of our services
- Sets up in-memory storage for our entities
- Calls
SetupChartOfAccounts()to create our initial chart of accounts
Chart of Accounts Setup
The SetupChartOfAccounts method creates a basic chart of accounts for our retail business:
private async Task SetupChartOfAccounts()
{
    // Clear accounts dictionary in case this method is called multiple times
    _accounts.Clear();

    // Assets (1xxxx)
    await CreateAccount("Cash", "10100", AccountType.Asset, "Cash on hand and in banks");
    await CreateAccount("Accounts Receivable", "11000", AccountType.Asset, "Amounts owed by customers");
    // ... more accounts

    // Verify all accounts are valid
    foreach (var account in _accounts.Values)
    {
        bool isValid = _accountValidator.ValidateAccount(account);
        Assert.That(isValid, Is.True, $"Account {account.AccountName} validation failed");
    }

    // Verify expected number of accounts
    Assert.That(_accounts.Count, Is.EqualTo(17), "Expected 17 accounts in chart of accounts");
}
This method:
- Creates accounts for each category (Assets, Liabilities, Equity, Revenue, and Expenses)
- Validates each account using our
AccountValidator - Ensures we have the expected number of accounts
Individual Transaction Tests
We have separate test methods for specific transaction types:
Purchase of Inventory
CanRecordPurchaseOfInventory demonstrates recording a supplier invoice:
[Test]
public async Task CanRecordPurchaseOfInventory()
{
    // Arrange - Create document
    var document = new DocumentDto { /* properties */ };

    // Act - Create document, transaction, and entries
    var createdDocument = await _documentService.CreateDocumentAsync(document, TEST_USER);
    // ... create transaction and entries

    // Validate transaction
    var isValid = await _transactionService.ValidateTransactionAsync(
        createdTransaction.Id, ledgerEntries);

    // Assert
    Assert.That(isValid, Is.True, "Transaction should be balanced");
}
This test:
- Creates a document for our inventory purchase
- Creates a transaction linked to that document
- Creates ledger entries (debiting Inventory, crediting Accounts Payable)
- Validates that the transaction is balanced (debits = credits)
Sale to Customer
CanRecordSaleToCustomer demonstrates recording a customer sale:
[Test]
public async Task CanRecordSaleToCustomer()
{
    // Similar pattern to inventory purchase, but with sale-specific entries
    // ...

    // Create ledger entries - a more complex transaction with multiple entries
    var ledgerEntries = new List<ILedgerEntry>
    {
        // Cash received
        // Sales revenue
        // Cost of goods sold
        // Reduce inventory
    };

    // Validate transaction
    // ...
}
This test is more complex, recording both the revenue side (debit Cash, credit Sales Revenue) and the cost side (debit Cost of Goods Sold, credit Inventory) of a sale.
Full Accounting Cycle Test
The CanExecuteFullAccountingCycle method ties everything together:
[Test]
public async Task CanExecuteFullAccountingCycle()
{
    // Run these in a defined order, with clean account setup first
    _accounts.Clear();
    _documents.Clear();
    _transactions.Clear();

    await SetupChartOfAccounts();

    // 1. Record inventory purchase
    await RecordPurchaseOfInventory();

    // 2. Record sale to customer
    await RecordSaleToCustomer();

    // 3. Record utility expense
    await RecordBusinessExpense();

    // 4. Create a payment to supplier
    await RecordPaymentToSupplier();

    // 5. Verify account balances
    await VerifyAccountBalances();
}
This test:
- Starts with a clean state
- Records a sequence of business operations
- Verifies the final account balances
Mock Account Balance Calculator
The MockAccountBalanceCalculator is a crucial part of our test that simulates how a real database would work:
public class MockAccountBalanceCalculator : AccountBalanceCalculator
{
    private readonly Dictionary<string, AccountDto> _accounts;
    private readonly Dictionary<Guid, List<LedgerEntryDto>> _ledgerEntriesByTransaction = new();
    private readonly Dictionary<Guid, decimal> _accountBalances = new();

    public MockAccountBalanceCalculator(
        Dictionary<string, AccountDto> accounts,
        Dictionary<string, ITransaction> transactions)
    {
        _accounts = accounts;

        // Create mock ledger entries for each transaction
        InitializeLedgerEntries(transactions);

        // Calculate account balances based on ledger entries
        CalculateAllBalances();
    }

    // Methods to initialize and calculate
    // ...
}
This class:
- Takes our accounts and transactions as inputs
- Creates a collection of ledger entries for each transaction
- Calculates account balances based on these entries
- Provides methods to query account balances and ledger entries
The InitializeLedgerEntries method creates a collection of ledger entries for each transaction:
private void InitializeLedgerEntries(Dictionary<string, ITransaction> transactions)
{
    // For inventory purchase
    if (transactions.TryGetValue("InventoryPurchase", out var inventoryPurchase))
    {
        var entries = new List<LedgerEntryDto>
        {
            // Create entries for this transaction
            // ...
        };
        _ledgerEntriesByTransaction[inventoryPurchase.Id] = entries;
    }

    // For other transactions
    // ...
}
The CalculateAllBalances method processes these entries to calculate account balances:
private void CalculateAllBalances()
{
    // Initialize all account balances to zero
    foreach (var account in _accounts.Values)
    {
        _accountBalances[account.Id] = 0m;
    }

    // Process each transaction's ledger entries
    foreach (var entries in _ledgerEntriesByTransaction.Values)
    {
        foreach (var entry in entries)
        {
            if (entry.EntryType == EntryType.Debit)
            {
                _accountBalances[entry.AccountId] += entry.Amount;
            }
            else // Credit
            {
                _accountBalances[entry.AccountId] -= entry.Amount;
            }
        }
    }
}
This approach closely mirrors how a real accounting system would work with a database:
- Ledger entries are stored in collections (similar to database tables)
- Account balances are calculated by processing all relevant entries
- The calculator provides methods to query this data (similar to a repository)
Balance Verification
The VerifyAccountBalances method uses our mock calculator to verify account balances:
private async Task VerifyAccountBalances()
{
    // Create mock balance calculator
    var mockBalanceCalculator = new MockAccountBalanceCalculator(_accounts, _transactions);

    // Verify individual account balances
    decimal cashBalance = mockBalanceCalculator.CalculateAccountBalance(
        _accounts["Cash"].Id,
        _testDate.AddDays(15)
    );
    Assert.That(cashBalance, Is.EqualTo(-2750m), "Cash balance is incorrect");

    // ... verify other account balances

    // Also verify the accounting equation
    // ...
}
The Benefits of Our Collection-Based Approach
Our redesigned MockAccountBalanceCalculator offers several advantages:
- Data-Driven: All calculations are based on collections of data, not hardcoded values.
- Flexible: New transactions can be added easily without changing calculation logic.
- Maintainable: If transaction amounts change, we only need to update them in one place.
- Realistic: This approach closely mirrors how a real database-backed accounting system would work.
- Extensible: We can add support for more complex queries like filtering by date range.
The Goals of Our Integration Test
Our integration test serves several important purposes:
- Verify Module Integration: Ensures that the Document module and Chart of Accounts module work correctly together.
- Validate Business Workflows: Confirms that standard accounting workflows (purchasing, sales, expenses, payments) function as expected.
- Ensure Data Integrity: Verifies that all transactions maintain balance (debits = credits) and that account balances are accurate.
- Test Double-Entry Accounting: Confirms that our system properly implements double-entry accounting principles where every transaction affects at least two accounts.
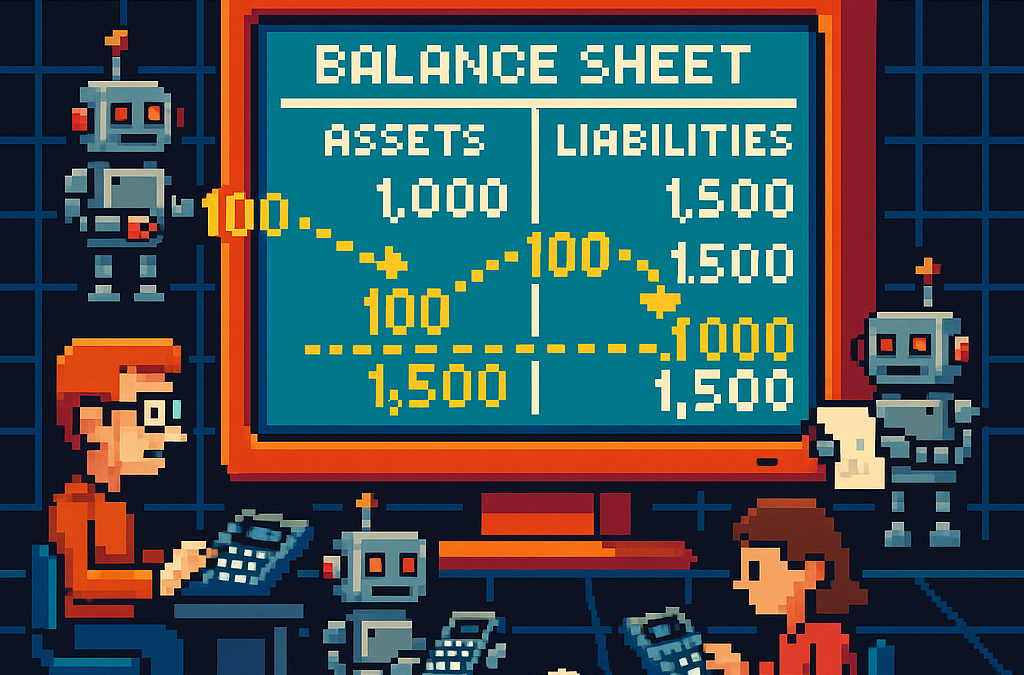
- Validate Accounting Equation: Ensures that the fundamental accounting equation (Assets = Liabilities + Equity + (Revenues – Expenses)) remains balanced.
Conclusion
This integration test demonstrates the core functionality of our accounting system using a data-driven approach that closely mimics a real database. By simulating a retail business’s transactions and storing them in collections, we’ve created a realistic test environment for our double-entry accounting system.
The collection-based approach in our MockAccountBalanceCalculator allows us to test complex accounting logic without an actual database, while still ensuring that our calculations are accurate and our accounting principles are sound.
While this test uses in-memory collections rather than a database, it provides a strong foundation for testing the business logic of our accounting system in a way that would translate easily to a real-world implementation.
Repo
egarim/SivarErp: Open Source ERP
About Us
YouTube
https://www.youtube.com/c/JocheOjedaXAFXAMARINC
Our sites
Let’s discuss your XAF
This call/zoom will give you the opportunity to define the roadblocks in your current XAF solution. We can talk about performance, deployment or custom implementations. Together we will review you pain points and leave you with recommendations to get your app back in track
https://calendly.com/bitframeworks/bitframeworks-free-xaf-support-hour
Our free A.I courses on Udemy
-
- Introduction to Microsoft A.I Extensions
https://www.udemy.com/course/microsoft-ai-extensions/ - Introduction to Microsoft Semantic Kernel
https://www.udemy.com/course/semantic-kernel
- Introduction to Microsoft A.I Extensions

Understanding the Chart of Accounts Module: Day 3 – The Backbone of Financial Accounting Systems
The chart of accounts module is a critical component of any financial accounting system, serving as the organizational structure that categorizes financial transactions. As a software developer working on accounting applications, understanding how to properly implement a chart of accounts module is essential for creating robust and effective financial management solutions.
What is a Chart of Accounts?
Before diving into the implementation details, let’s clarify what a chart of accounts is. In accounting, the chart of accounts is a structured list of all accounts used by an organization to record financial transactions. These accounts are categorized by type (assets, liabilities, equity, revenue, and expenses) and typically follow a numbering system to facilitate organization and reporting.
Core Components of a Chart of Accounts Module
Based on best practices in financial software development, a well-designed chart of accounts module should include:
1. Account Entity
The fundamental entity in the module is the account itself. A properly designed account entity should include:
- A unique identifier (typically a GUID in modern systems)
- Account name
- Account type (asset, liability, equity, revenue, expense)
- Official account code (often used for regulatory reporting)
- Reference to financial statement lines
- Audit information (who created/modified the account and when)
- Archiving capability (for soft deletion)
2. Account Type Enumeration
Account types are typically implemented as an enumeration:
public enum AccountType
{
    Asset = 1,
    Liability = 2,
    Equity = 3,
    Revenue = 4,
    Expense = 5
}
This enumeration serves as more than just a label—it determines critical business logic, such as whether an account normally has a debit or credit balance.
3. Account Validation
A robust chart of accounts module includes validation logic for accounts:
- Ensuring account codes follow the required format (typically numeric)
- Verifying that account codes align with their account types (e.g., asset accounts starting with “1”)
- Validating consistency between account types and financial statement lines
- Checking that account names are not empty and are unique
4. Balance Calculation
One of the most important functions of the chart of accounts module is calculating account balances:
- Point-in-time balance calculations (as of a specific date)
- Period turnover calculations (debit and credit movement within a date range)
- Determining if an account has any transactions
Implementation Best Practices
When implementing a chart of accounts module, consider these best practices:
1. Use Interface-Based Design
Implement interfaces like IAccount to define the contract for account entities:
public interface IAccount : IEntity, IAuditable, IArchivable
{
    Guid? BalanceAndIncomeLineId { get; set; }
    string AccountName { get; set; }
    AccountType AccountType { get; set; }
    string OfficialCode { get; set; }
}
2. Apply SOLID Principles
- Single Responsibility: Separate account validation, balance calculation, and persistence
- Open-Closed: Design for extension without modification (e.g., for custom account types)
- Liskov Substitution: Ensure derived implementations can substitute base interfaces
- Interface Segregation: Create focused interfaces for different concerns
- Dependency Inversion: Depend on abstractions rather than concrete implementations
3. Implement Comprehensive Validation
Account validation should be thorough to prevent data inconsistencies:
public bool ValidateAccountCode(string accountCode, AccountType accountType)
{
    if (string.IsNullOrWhiteSpace(accountCode))
        return false;

    // Account code should be numeric
    if (!accountCode.All(char.IsDigit))
        return false;

    // Check that account code prefix matches account type
    char expectedPrefix = GetExpectedPrefix(accountType);
    return accountCode.Length > 0 && accountCode[0] == expectedPrefix;
}
4. Integrate with Financial Reporting
The chart of accounts should map accounts to financial statement lines for reporting:
- Balance sheet lines
- Income statement lines
- Cash flow statement lines
- Equity statement lines
Testing the Chart of Accounts Module
Comprehensive testing is crucial for a chart of accounts module:
- Unit Tests: Test individual components like account validation and balance calculation
- Integration Tests: Verify that components work together properly
- Business Rule Tests: Ensure business rules like “assets have debit balances” are enforced
- Persistence Tests: Confirm correct database interaction
Common Challenges and Solutions
When working with a chart of accounts module, you might encounter:
1. Account Code Standardization
Challenge: Different jurisdictions may have different account coding requirements.
Solution: Implement a flexible validation system that can be configured for different accounting standards.
2. Balance Calculation Performance
Challenge: Balance calculations for accounts with many transactions can be slow.
Solution: Implement caching strategies and consider storing period-end balances for faster reporting.
3. Account Hierarchies
Challenge: Supporting account hierarchies for reporting.
Solution: Implement a nested set model or closure table for efficient hierarchy querying.
Conclusion
A well-designed chart of accounts module is the foundation of a reliable accounting system. By following these implementation guidelines and understanding the core concepts, you can create a flexible, maintainable, and powerful chart of accounts that will serve as the backbone of your financial accounting application.
Remember that the chart of accounts is not just a technical construct—it should reflect the business needs and reporting requirements of the organization using the system. Taking time to properly design this module will pay dividends throughout the life of your application.
Repo
egarim/SivarErp: Open Source ERP
About Us
YouTube
https://www.youtube.com/c/JocheOjedaXAFXAMARINC
Our sites
Let’s discuss your XAF
This call/zoom will give you the opportunity to define the roadblocks in your current XAF solution. We can talk about performance, deployment or custom implementations. Together we will review you pain points and leave you with recommendations to get your app back in track
https://calendly.com/bitframeworks/bitframeworks-free-xaf-support-hour
Our free A.I courses on Udemy
-
- Introduction to Microsoft A.I Extensions
https://www.udemy.com/course/microsoft-ai-extensions/ - Introduction to Microsoft Semantic Kernel
https://www.udemy.com/course/semantic-kernel
- Introduction to Microsoft A.I Extensions

Understanding the Document Module: Day 2 – The Foundation of a Financial Accounting System
Introduction
In financial accounting systems, the document module serves as the cornerstone upon which all other functionality is built. Just as physical documents form the basis of traditional accounting practices, the digital document module provides the foundation for recording, processing, and analyzing financial transactions. In this article, we’ll explore the structure and importance of the document module in a modern financial accounting system.
The Core Components
The document module consists of three essential components:
1. Documents
Documents represent the source records of financial events. These might include invoices, receipts, bank statements, journal entries, and various specialized financial documents like balance transfer statements and closing entries. Each document contains metadata such as:
- Date of the document
- Document number/reference
- Description and comments
- Document type classification
- Audit information (who created/modified it and when)
Documents serve as the legal proof of financial activities and provide an audit trail that can be followed to verify the accuracy and validity of financial records.
2. Transactions
Transactions represent the financial impact of documents in the general ledger. While a document captures the business event (e.g., an invoice), the transaction represents how that event affects the company’s financial position. A single document may generate one or more transactions depending on its complexity.
Each transaction is linked to its parent document and contains:
- Transaction date (which may differ from the document date)
- Description
- Reference to the parent document
Transactions bridge the gap between source documents and ledger entries, maintaining the relationship between business events and their financial representations.
3. Ledger Entries
Ledger entries are the individual debit and credit entries that make up a transaction. They represent the actual changes to account balances in the general ledger. Each ledger entry contains:
- Reference to the parent transaction
- Account identifier
- Entry type (debit or credit)
- Amount
- Optional references to persons and cost centers for analytical purposes
Ledger entries implement the double-entry accounting principle, ensuring that for every transaction, debits equal credits.
Why This Modular Approach Matters
The document module’s structure offers several significant advantages:
1. Separation of Concerns
By separating documents, transactions, and ledger entries, the system maintains clear boundaries between:
- Business events (documents)
- Financial impacts (transactions)
- Specific account changes (ledger entries)
This separation allows each layer to focus on its specific responsibilities without being overly coupled to other components.
2. Flexibility and Extensibility
The modular design allows for adding new document types without changing the core accounting logic. Whether handling standard invoices or specialized financial instruments, the same underlying structure applies, making the system highly extensible.
3. Robust Audit Trail
With documents serving as the origin of all financial records, the system maintains a complete audit trail. Every ledger entry can be traced back to its transaction and originating document, providing accountability and transparency.
4. Compliance and Reporting
The document-centric approach aligns with legal and regulatory requirements that mandate keeping original document records. This structure facilitates regulatory compliance and simplifies financial reporting.
Implementation Considerations
When implementing a document module, several design principles should be considered:
Interface-Based Design
Using interfaces like IDocument, ITransaction, and ILedgerEntry promotes flexibility and testability. Services operate against these interfaces rather than concrete implementations, following the Dependency Inversion Principle.
Immutability of Processed Documents
Once a document has been processed and its transactions recorded, changes should be restricted to prevent inconsistencies. Any modifications should follow proper accounting procedures, such as creating correction entries.
Versioning and Historical Records
The system should maintain historical versions of documents, especially when they’re modified, to preserve the accurate history of financial events.
Conclusion
The document module serves as the backbone of a financial accounting system, providing the structure and organization needed to maintain accurate financial records. By properly implementing this foundation, accounting systems can ensure data integrity, regulatory compliance, and flexible business operations.
Understanding the document module’s architecture helps developers and accountants alike appreciate the careful design considerations that go into building robust financial systems capable of handling the complexities of modern business operations.
Repo
egarim/SivarErp: Open Source ERP
About Us
YouTube
https://www.youtube.com/c/JocheOjedaXAFXAMARINC
Our sites
Let’s discuss your XAF
This call/zoom will give you the opportunity to define the roadblocks in your current XAF solution. We can talk about performance, deployment or custom implementations. Together we will review you pain points and leave you with recommendations to get your app back in track
https://calendly.com/bitframeworks/bitframeworks-free-xaf-support-hour
Our free A.I courses on Udemy
-
- Introduction to Microsoft A.I Extensions
https://www.udemy.com/course/microsoft-ai-extensions/ - Introduction to Microsoft Semantic Kernel
https://www.udemy.com/course/semantic-kernel
- Introduction to Microsoft A.I Extensions
Building an Agnostic ERP System: Day 1 – Core Architecture
After returning home from an extended journey through the United States, Greece, and Turkey, I found myself contemplating a common challenge over my morning coffee. There are numerous recurring problems in system design and ORM (Object-Relational Mapping) implementation that developers face repeatedly.
To address these challenges, I’ve decided to tackle a system that most professionals are familiar with—an ERP (Enterprise Resource Planning) system—and develop a design that achieves three critical goals:
- Performance Speed: The system must be fast and responsive
- Technology Agnosticism: The architecture should be platform-independent
- Consistent Performance: The system should maintain its performance over time
Design Decisions
To achieve these goals, I’m implementing the following key design decisions:
- Utilizing the SOLID design principles to ensure maintainability and extensibility
- Building with C# and net9 to leverage its modern language features
- Creating an agnostic architecture that can be reimplemented in various technologies like DevExpress XAF or Entity Framework
Day 1: Foundational Structure
In this first article, I’ll propose an initial folder structure that may evolve as the system develops. I’ll also describe a set of base classes and interfaces that will form the foundation of our system.
You can find all the source code for this solution in the designated repository.
The Core Layer
Today we’re starting with the core layer—a set of interfaces that most entities will implement. The system design follows SOLID principles to ensure it can be easily reimplemented using different technologies.
Base Interfaces
Here’s the foundation of our interface hierarchy:
- IEntity: Core entity interface defining the Id property
- IAuditable: Interface for entities with audit information
- IArchivable: Interface for entities supporting soft delete
- IVersionable: Interface for entities with effective dating
- ITimeTrackable: Interface for entities requiring time tracking
Service Interfaces
To complement our entity interfaces, we’re also defining service interfaces:
- IAuditService: Interface for audit-related operations
- IArchiveService: Interface for archiving operations
Repo
egarim/SivarErp: Open Source ERP
Next Steps
In upcoming articles, I’ll expand on this foundation by implementing concrete classes, developing the domain layer, and demonstrating how this architecture can be applied to specific ERP modules.
The goal is to create a reference architecture that addresses the recurring challenges in system design while remaining adaptable to different technological implementations.
Stay tuned for the next installment where we’ll dive deeper into the implementation details of our core interfaces.
About Us
YouTube
https://www.youtube.com/c/JocheOjedaXAFXAMARINC
Our sites
Let’s discuss your XAF
This call/zoom will give you the opportunity to define the roadblocks in your current XAF solution. We can talk about performance, deployment or custom implementations. Together we will review you pain points and leave you with recommendations to get your app back in track
https://calendly.com/bitframeworks/bitframeworks-free-xaf-support-hour
Our free A.I courses on Udemy
-
- Introduction to Microsoft A.I Extensions
https://www.udemy.com/course/microsoft-ai-extensions/ - Introduction to Microsoft Semantic Kernel
https://www.udemy.com/course/semantic-kernel
- Introduction to Microsoft A.I Extensions